-->

Css Icon Hover Effect Navigation Bar For Blogger

Every web developers using Css3 Icon hover effect during their development process.There have many techniques they have to focus on.Like faster loading,efficient and handling easier.There have lot of advantages of using Css3 hover effects,web developers and webmasters know it well.Designing website also learning process.On this tutorials also show us how to use Css3 Icon hover effect  navigation bar without using any JavaScript library. Css3 always helpful to customize our animation easily.It is very easy because optimized by HTML.Hope every visitors have browsing experience with,how is the Css3 Icon hover effect works.
Navigation bar is very important  bloggers. We can navigate our pages, categories without having problem.There have lot of benefits of using Css3 Icon hover effect navigation bar.It help our audience to find our important pages like contact us page, About us, Advertising etc.And other thing is, if you choose some nice looking navigation bar, it help to make your blog attractive.By studying this tutorial, you can learn how to add Css3 Icon hover effect navigation bar to blogger.This is very useful
web developers as well. You can check demo by demo button.How this helpful to you.

How to add Css Icon Hover Effect Navigation Bar

Css+Icon+Hover+Effect+Navigation+Bar


1. Go to Blogger Dashboard > Template
2. Backup your template
3. Click on Edit HTML
4. Find  ]]></b:skin>   and add below code just above it

/* The CSS Code for the menu starts here bloggertrix.com */ #btrix-nav {margin: 100px auto;list-style: none;width: 632px;height: 87px;overflow-y: hidden;}
#btrix-nav li {float: left;}
#btrix-nav li a {display: block;color: white;width: 120px;height: 61px;margin-top: 24px;text-decoration: none;text-align: center;border-top: 1px solid #bbb;border-bottom: 1px solid #555;}
#btrix-nav li a span.aname {font: bold 17px/61px "Arial";color: #fff;text-transform: uppercase;cursor: pointer;position: relative;top: 0;transition: top .5s ease;text-shadow: 1px 1px 1px rgba(0, 0, 0, 0.5);}
#btrix-nav li a img {position: relative;top: 0;transition: top .5s ease;}
#btrix-nav li a:hover {cursor: pointer;}
#btrix-nav li a:hover img {top: -85px;}
#btrix-nav li a:hover .aname {top: 85px;}
#btrix-nav li:nth-child(1) a {background: #3eb006;border-radius: 5px 0 0 5px;border-left: 1px solid #bbb;}
#btrix-nav li:nth-child(2) a {background: #9bc704;}
#btrix-nav li:nth-child(3) a {background: #0dc3ff;}
#btrix-nav li:nth-child(4) a {background: #51a2ec;}
#btrix-nav li:nth-child(5) a {background: #6e3cab;border-radius: 0 5px 5px 0;border-right: 1px solid #555;}

5. Go to blogger Layout
6. Click Add Gadget and select 'HTML/Javascript'
7. Paste below code.

<div id="btrix-nav">
<li> <a href="#"><span class="aname">Homes</span> <img src="https://blogger.googleusercontent.com/img/b/R29vZ2xl/AVvXsEjaUX5hcrjoTG6CgZvXP-BqqhPuvzGrNTXruVTHLIwAFuKKlR3LfdIGb4nm_urIn9BcMGkwM8Xx87pGuBgI1EjkUF0fL-oaeBP8cEv4rBk4HWMHcA1Eehl9-9y2uckrmWqnZ1NMOf9StNY/s1600/btrix-home.png" /> </a> </li>
<li> <a href="#"> <span class="aname">Download</span> <img src="https://blogger.googleusercontent.com/img/b/R29vZ2xl/AVvXsEg3ybVoGHMW3eYXLCJiyx9pBDUcs4t6P7iN1pUbBypCHaQGGRafTzqBl-8Q7mywy2zIuz0C7CG_fLkpwHFAZwwJoA5nA7FBarr-2zYmbiZYqtGzR2APJ8na9sXbZhegF89FP2uh4OCZ0dg/s1600/btrix-download.png" /> </a> </li>
<li> <a href="#"> <span class="aname"> MySql</span> <img src="https://blogger.googleusercontent.com/img/b/R29vZ2xl/AVvXsEhfyW4J9SyEBJqjickZ8q4Qg9xDcVqNa1VLxK8iK1lanY2kdL62hdEFeAkcwXOR7ckiY4YovUTz_fN7YdjRS_5MQXKlfBwQB1SkFtHbqm2cWmwLQ_bAt11EA2IOqGvZxh15uGWdTfWcvX4/s1600/btrix-mysql.png" /> </a> </li>
<li> <a href="#"> <span class="aname"> Html</span> <img src="https://blogger.googleusercontent.com/img/b/R29vZ2xl/AVvXsEi0_bJ7eSz2kUYl5k3N7L6O7v6jSKSyXl5fl2iZOr72qUNY7He_9l8x9YF1WFuZpME2Bgtv2PUewbEE-WgZKIl8HnDsK-I3lK8F80clLwOP84RnE255d_XsyLZjJnAU1vLYUDD1ZMmZOsM/s1600/Btrix-html.png" /> </a> </li>
<li> <a href="#"> <span class="aname">Contact</span> <img src="https://blogger.googleusercontent.com/img/b/R29vZ2xl/AVvXsEgS3Z4J6Q_Uv0za-EAEcJ5G9bxNnpDY3CNrjWGJFEATVv0qfte6-6zkBROu60vDbpEJPLR7FSqmADLV897-FXkjFL55g67Qm2Eiq9O0lQMC2cwD0O1Pl99yjzAixVNDa0UD6ySYr4suy9w/s1600/btrix-contact.png" /> </a> </li> </div>
Replace # with your links.

8. Now save your HTML/Javascript'.

You are done. If you have any problem related to this Css Icon Hover Effect Navigation Bar. Just leave a comment.I will help to you.
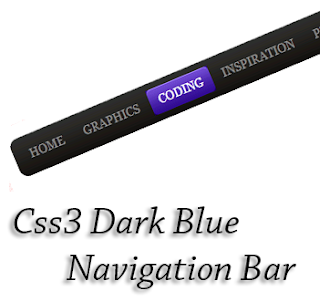
Css3 Dark Blue Navigation Bar For Blogger

Navigation bar is very important in websites. It helps to navigate important page easily.So, your audience can find important pages.Other things is, Everyone can add navigation bar for their blogs.
But you have to add attractive menu for your blogs.It will give nice looks to your blogs and helps to attractive your audience too.In this tutorial im gonna explain how to add Css3 dark blue navigation bar for your blog.Every steps explained well to understand newbies.Just give a try to add Css3 Dark color navigation bar.


How to add Css3 Dark Blue Navigation Bar


Css3+Dark+Blue+Navigation+Bar


1. Log in to blogger account and Click drop down.
blog-post-option
2. Now select "Template" Like Below.

Select-template

3. Now you can see Live on blog, Click EDIT HTML Button"

4. Find this tag by using Ctrl+F    ]]></b:skin>

5. Paste below code Before ]]></b:skin> tag

/* The CSS Code for the menu starts here bloggertrix.com */

#navigation1 { width:900px;height: 45px; background: url(https://blogger.googleusercontent.com/img/b/R29vZ2xl/AVvXsEg6Hm2hgRXUZzNADhdYK6BB9LKuMNY0sRDLZ2NLstG7bNwycG_MAwOKNzmdzLwzizgHUD89b-GLU2hiNuogBXURCAS4Z1qnCnYHqeh0FLQPTUBhpq3_-FAQhhRHsci_nFuI5GP04EEhEpI/s1600/nav-bg.gif) repeat-x 0 0;
border:inherit 2px #000000;
-moz-border-radius-topleft: 10px;-moz-border-radius-topright:10px;-moz-border-radius-bottomleft:10px;-moz-border-radius-bottomright:10px;-webkit-border-top-left-radius:10px;-webkit-border-top-right-radius:10px;-webkit-border-bottom-left-radius:10px;-webkit-border-bottom-right-radius:10px;
border-top-left-radius:10px;border-top-right-radius:10px;border-bottom-left-radius:10px;border-bottom-right-radius:10px; }
#navigation1 ul { list-style: none outside; padding: 8px 0 0 8px; }
#navigation1 li { float: left; display: inline; height: 29px; line-height: 29px; text-transform: uppercase; margin-right: 3px }
#navigation1 li.last { margin-right: 0; }
#navigation1 li a,
#navigation1 li a span { float: left; display: inline; height: 29px; padding-left: 10px; background-position: 0 0; color: #919191; }
#navigation1 li a span { padding-left: 0; padding-right: 10px;  background-position: right 0; }
#navigation1 ul.sf-menu li a:hover,
#navigation1 ul.sf-menu li a:hover span { background-image: url(https://blogger.googleusercontent.com/img/b/R29vZ2xl/AVvXsEifYSuJleeOuHg-0JvOuZV288dEDa3cQF5Ejolj6hn8oGCaeuNg7uGGLlJDdyi9G-Jsuj7MmL1WSnyr20bUDmrel2iedndx0KIhEDHl93D6p9Z9vJk8LlF3MSuykU2_Izv5l5uIMTxT2lU/s1600/bt_nav_hover.png); text-decoration: none; color: #fff; }
#navigation1 li a.clicked,
#navigation1 li a.clicked span { background-position: 0 bottom }
#navigation1 li a.clicked span { background-position: right bottom; }

6. Go to blogger and click Layout

7. Click Add Gadget and select 'HTML/Javascript

8. Paste below code.

<div id="navigation1">
<ul class="sf-menu sf-js-enabled sf-shadow">
<li class="cat-item cat-item-29"><a title="Home" href="#"><span>HOME</span></a></li>
<li class="cat-item cat-item-29"><a href="#" title="Graphics"><span>Graphics</span></a></li>
<li class="cat-item cat-item-31"><a href="#" title="Coding"><span>Coding</span></a></li>
<li class="cat-item cat-item-18"><a href="#" title="inspiration"><span>inspiration</span></a> </li>
<li class="cat-item cat-item-1"> <a href="#" title="Photography"><span>Photography</span></a></li>
<li class="cat-item cat-item-30"><a href="#" title="Freebies"><span>Blogger</span></a></li>
<li class="cat-item cat-item-19"><a href="#" title="Wordpress"><span>Wordpress</span></a></li>
<li class="cat-item cat-item-25"><a href="#" title="Logo"><span>Logo</span></a></li>
<li class="cat-item cat-item-22"><a href="#" title="Contact"><span>Contact</span></a>
</li></ul></div>
Replace # with your links.

9. Now save your HTML/Javascript'.

You are done. If you have any problem related to this Css3 Dark blue navigation bar. Just leave a comment.I will help to you.

Greeny Css3 Navigation Bar For Blogger

In this  tutorial im gonna explain how to add Greeny Css3 navigation bar for blogger. You can add this cool menu bar within few seconds.This Greeny navigation bar work fine with every modern internet  browsers. This include with nice drop down menu. So, You can link with your main pages by  using this Css3 thin navigation bar.Will see how to add this CSS3 navigation bar within few seconds.
    
Css3-Navigation-Bar

Greeny Css3 Navigation Bar For Blogger


1. Log in to blogger account and Click drop down.
blog-post-option
2. Now select "Template" Like Below.

Select-template

3. Now you can see Live on blog, Click EDIT HTML Button"

4. Find this tag by using Ctrl+F    ]]></b:skin>

5. Paste below code Before ]]></b:skin> tag

/* The CSS3 Code for the menu starts here bloggertrix.com */
 .btrix-greenymenu{width:950px;background: #7cae15;color:#eee;text-shadow: 1px 1px 1px #495505;display:inline-block;-moz-box-shadow: 3px 3px 4px #007308;
-webkit-box-shadow: 3px 3px 4px #007308;box-shadow: 3px 3px 4px #007308;-moz-border-radius-topleft: 8px;-moz-border-radius-topright:8px;-moz-border-radius-bottomleft:8px;-moz-border-radius-bottomright:8px;-webkit-border-top-left-radius:8px;-webkit-border-top-right-radius:8px;-webkit-border-bottom-left-radius:8px;-webkit-border-bottom-right-radius:8px;border-top-left-radius:8px;border-top-right-radius:8px;border-bottom-left-radius:8px;border-bottom-right-radius:8px;}
.btrix-greenymenu ul{width:950px;padding:0;margin:0 auto}
.btrix-greenymenu li:first-child a{padding:7px 10px 3px}
.btrix-greenymenu li{list-style:none;display:inline-block;float:left}
.btrix-greenymenu li a{background:url(http://1.bp.blogspot.com/-4OIAjD0uSN0/UR1FWgJm2YI/AAAAAAAAAJk/H-ajqHe53Ic/s1600/sprite.png) right no-repeat;color:#fff;display:block;font:16px Oswald;position:relative;text-decoration:none;padding: 8px 15px;-moz-border-radius-topleft: 8px;-moz-border-radius-topright:8px;-moz-border-radius-bottomleft:8px;-moz-border-radius-bottomright:8px;-webkit-border-top-left-radius:8px;-webkit-border-top-right-radius:8px;-webkit-border-bottom-left-radius:8px;-webkit-border-bottom-right-radius:8px;
border-top-left-radius:8px;border-top-right-radius:8px;border-bottom-left-radius:8px;border-bottom-right-radius:8px;}
.btrix-greenymenu li a:hover{background:#333;color:#fff;text-shadow: 1px 1px 1px #000;-moz-border-radius-topleft: 8px;-moz-border-radius-topright:8px;-moz-border-radius-bottomleft:8px;-moz-border-radius-bottomright:8px;-webkit-border-top-left-radius:8px;-webkit-border-top-right-radius:8px;-webkit-border-bottom-left-radius:8px;-webkit-border-bottom-right-radius:8px;
border-top-left-radius:8px;
border-top-right-radius:8px;
border-bottom-left-radius:8px;
border-bottom-right-radius:8px;}
.btrix-greenymenu li a .sf-sub-indicator{overflow:hidden;position:absolute;text-indent:-9999px}
.btrix-greenymenu li li a,.btrix-greenymenu li li a:link,.btrix-greenymenu li li a:visited{background:#439700;border-bottom:1px solid #000;border-right:none;color:#fff;font:12px Arial;position:relative;text-transform:none;width:138px;padding:10px 10px;text-shadow: none;opacity:0.8}
.btrix-greenymenu li li a:hover,.btrix-greenymenu li li a:active{background:#444}
.btrix-greenymenu li ul{height:auto;left:-9999px;position:absolute;width:160px;z-index:9999;margin:0}
.btrix-greenymenu li ul a{width:140px}
.btrix-greenymenu li ul ul{margin:-33px 0 0 157px}
.btrix-greenymenu li:hover>ul,.btrix-greenymenu li.sfHover ul{left:auto}
.menusearch{width:200px;float:right;margin:0 auto;padding:5px 10px 0}
.searchform {margin-top:0px;display: inline-block;*display: inline;padding:0;background:#fff;width:200px;height:23px; overflow:hidden;-webkit-border-radius:3px;-moz-border-radius:3px;border-radius:3px;border:1px solid #5c820d;}
.searchform input {font:italic 12px Arial;color:#222;line-height:23px;height:23px;padding:0;margin:0;}
.searchform .searchfield {background:transparent;padding:0 0 0 6px;margin:0;width: 160px;height:23px;border:0px;outline: none;line-height:23px;}
.searchform .searchbutton{border:none;font-size:12px;height:23px;width:23px;margin:0;padding:0}

6. Go to blogger and click Layout

7. Click Add Gadget and select 'HTML/Javascript

8. Paste below code.

<div class="btrix-greenymenu">
<ul class="sf-menu">
<li><a href="http://www.blogger.com/"><img alt="home" src="https://blogger.googleusercontent.com/img/b/R29vZ2xl/AVvXsEhSFXiuGrGK4apuFPhLbzk0pabEUtovMWHR-6tKm0ZvwO8s7Xu3T5tY1z79qZ4fmEBFkMUF8KqUPka8ujngQBCYHkixmgdWPk84Uk4ZbBf4AU4RhVnnJDjrL6jixyOKEpNetvEnqLiBg4M/s1600/home.gif" style="padding: 0px;" /></a></li>
<li><a href="#">Menu 1</a></li>
<li><a href="#">Drop Menu 1</a>
<ul>
<li><a href="#">Sub Menu 1</a></li>
<li><a href="#">Sub Menu 2</a></li>
<li><a href="#">Sub Drop Menu 3</a>
<ul>
<li><a href="#">Sub Drop Menu 3.1</a></li>
<li><a href="#">Sub Drop Menu 3.2</a></li>
</ul>
</li>
</ul>
</li>
<li><a href="#">Drop Menu 2</a>
<ul>
<li><a href="#">Sub Menu 1</a></li>
<li><a href="#">Sub Menu 2</a></li>
<li><a href="#">Sub Menu 3</a></li>
</ul>
</li>
<li><a href="#">Menu 2</a></li>
<li><a href="#">Menu 3</a></li>
</ul>
<div class="menusearch">
<form action="/search" class="searchform" method="get">
<input class="searchfield" id="q" name="q" onblur="if(this.value=='')this.value=this.defaultValue;" onfocus="if(this.value==this.defaultValue)this.value=''" type="text" value="Search here...." />
    <input class="searchbutton" src="https://blogger.googleusercontent.com/img/b/R29vZ2xl/AVvXsEimtP-7stBA0k0ZMT-1OZSUQ3ZXeXvuuOMWA9FeHVYs7Baf38kFTnB3v1-v6TajxfI7p41aKSfzLfFI_ABcEBVIqK0fPpWYq2lq9ssZ-RA-2Ljp12NRQ4oMSWG5CPezDHCqSn-NBfFa-Wg/s1600/tombolcari.gif" style="cursor: pointer; vertical-align: top;" type="image" value="Go" />
</form>
</div>
</div>

Replace # with your links.

9. Now save your HTML/Javascript'.  You are done.

If you have any problem regarding this Greeny Css3 Navigation Bar. Leave a comment.

Classic Style Css3 Navigation Bar For Blogger


In this  tutorial  im  gonna  explain how to add simple
classic   style   Css3   Navigation   Bar   to   blogger.
This menu  work   fine  with  every   modern  internet 
browsers.  You  can  link  with  your   main pages by 
using this  navigation  bar.  Im using Css3 and HTML


Classic+Style+Css3+Navigation+Bar
    

1. Log in to blogger account and Click drop down.
blog-post-option
2. Now select "Template" Like Below.

Select-template

3. Now you can see Live on blog, Click EDIT HTML Button"

4. Find this tag by using Ctrl+F    ]]></b:skin>

5. Paste below code Before ]]></b:skin> tag

/* The CSS Code for the menu starts here bloggertrix.com */
#blogtrix_classic-menu{width:900px;background:#222 url(https://blogger.googleusercontent.com/img/b/R29vZ2xl/AVvXsEhecN9piqSNoYg27yPEmWMpwJM5d5pqPq8hmbLxt02w1Pdc0dKjbVDEd0r_QKM-SpfS5G7Hwzpf8JHHUWQfJcl7kmPjTz_JCmQRxg1LqkTBO6fm-K6L-5vX4EQCkVEiFKBvX04HJZWV_QA/s1600/btrixfooter_bg.png) repeat-x scroll top;color:#ddd;height:35px;-webkit-box-shadow:0 1px 5px #aaa;-moz-box-shadow:0 1px 5px #aaa;-ms-box-shadow:0 1px 5px #aaa;-o-box-shadow:0 1px 5px #aaa;box-shadow:0 1px 5px #aaa;border-bottom:1px solid #000;padding-top:8px;border:none 5px #000000;-moz-border-radius-topleft: 5px;-moz-border-radius-topright:5px;-moz-border-radius-bottomleft:5px;-moz-border-radius-bottomright:5px;-webkit-border-top-left-radius:5px;-webkit-border-top-right-radius:5px;-webkit-border-bottom-left-radius:5px;-webkit-border-bottom-right-radius:5px;
border-top-left-radius:5px;border-top-right-radius:5px;border-bottom-left-radius:5px;border-bottom-right-radius:5px;}
#blogtrix_classic-menu ul,#blogtrix_classic-menu li{margin:0 auto;padding:0 0;list-style:none}
#blogtrix_classic-menu ul{height:35px;width:980px}
#blogtrix_classic-menu li{float:left;display:inline;position:relative;font:14px Skranji;text-transform:uppercase;}
#blogtrix_classic-menu a{display:block;line-height:35px;padding:0 14px;text-decoration:none;color:#ddd;}
#blogtrix_classic-menu li a:hover{color:#fff}
#blogtrix_classic-menu input{display:none;margin:0 0;padding:0 0;width:80px;height:30px;opacity:0;cursor:pointer}
#blogtrix_classic-menu label{font:bold 30px Arial;display:none;width:35px;height:36px;line-height:36px;text-align:center}
#blogtrix_classic-menu label span{font-size:12px;position:absolute;left:35px}
#blogtrix_classic-menu ul.menus{height:auto;overflow:hidden;width:180px;background:#f1eeed url(http://3.bp.blogspot.com/-7ppDp44Yxtc/UUa_IMHEhpI/AAAAAAAAAjQ/F9QEGUl5S3w/s1600/index.png);position:absolute;z-index:99;display:none;}
#blogtrix_classic-menu ul.menus li{display:block;width:100%;font:12px Arial;text-transform:none;text-shadow:none}
#blogtrix_classic-menu ul.menus a{color:#333}
#blogtrix_classic-menu li:hover ul.menus{display:block}
#blogtrix_classic-menu a.prett{padding:0 27px 0 14px}
#blogtrix_classic-menu a.prett::after{content:"";width:0;height:0;border-width:6px 5px;border-style:solid;border-color:#ddd transparent transparent transparent;position:absolute;top:14px;right:9px}
#blogtrix_classic-menu ul.menus a:hover{background:#ddd;color:#333}
.page-blogtrix_classic-menu{width:70%;margin:18px auto;padding:0;float:right;text-shadow:0 1px 0 rgba(0,0,0,0.7)}
.page-blogtrix_classic-menu ul{list-style:none;color:#ddd;width:700px;margin:0 auto;padding:0}
.page-blogtrix_classic-menu ul li{list-style:none;line-height:32px;display:inline-block}
.page-blogtrix_classic-menu li a{color:#ddd;display:block;font-size:14px;font-family:Arial;position:relative;text-decoration:none;text-transform:capitalize;padding:0 10px}
.page-blogtrix_classic-menu li a:hover,.page-blogtrix_classic-menu .selected{color:#fff;text-decoration:none;background: rgba(0,0,0,.4);-moz-border-radius:4px;-webkit-border-radius:4px;border-radius:4px; -moz-box-shadow: 0 1px 0 rgba(255,255,255,.2), 0 2px 1px rgba(0,0,0,.9) inset;-webkit-box-shadow: 0 1px 0 rgba(255,255,255,.2), 0 2px 1px rgba(0,0,0,.9) inset;box-shadow: 0 1px 0 rgba(255,255,255,.2), 0 2px 1px rgba(0,0,0,.9) inset}

6. Go to blogger and click Layout

7. Click Add Gadget and select 'HTML/Javascript

8. Paste below code.

<div id="blogtrix_classic-menu">
<ul>
<li><a href="/">Home</a></li>
<li><a href="#">Menu 1</a></li>
<li><a class="prett" href="#">Drop list</a>
<ul class="menus">
<li><a href="#">Drop list 1</a></li>
<li><a href="#">Drop list 2</a></li>
<li><a href="#">Drop list 3</a></li>
</ul>
</li>
<li><a href="#">Menu 2</a></li>
<li><a class="prett" href="#">Drop list 1</a>
<ul class="menus">
<li><a href="#">Drop list 1</a></li>
<li><a href="#">Drop list 2</a></li>
<li><a href="#">Drop list 3</a></li>
</ul>
</li>
</ul>
</div>
Replace # with your links.

9. Now save your HTML/Javascript'.

    You are done...

Awesome Circle Style Navigation Menu for Blogger


This is a  Circle Style  navigation bar. Im gonna explain
how  to  add  it  to  blogger. This  menu  work  fine  with
every modern  internet  browsers.You can link with your
main  pages by  using  wire frame   navigation. Im  using 
Css3 and HTML,


1. Log in to blogger account and Click drop down.
blog-post-option
2. Now select "Template" Like Below.

Select-template

3. Now you can see Live on blog, Click EDIT HTML Button"

4. Find this tag by using Ctrl+F    ]]></b:skin>

5. Paste below code Before ]]></b:skin> tag

/* The CSS Code for the menu starts here bloggertrix.com */


.circlemenu{
width: 100%;
overflow:hidden;
}
.circlemenu ul{
margin: 0;
padding: 0;
font: bold 14px Verdana;
list-style-type: none;
text-align: center; 
}
.circlemenu li{
display: inline;
margin: 0;
}
.circlemenu li a{
display:inline-block;
text-align:center;
text-decoration: none;
color: white;
background:#b30707;
margin: 0;
margin-right:5px; 
width:100px;
height:100px;
border-radius: 400px; 
-moz-border-radius: 400px;
-webkit-border-radius: 400px;
}
.circlemenu a span{
position:relative;
top:40%;
}
.circlemenu li a:visited{
color: white;
}
.circlemenu a:hover{
background: #ff1774;
}


6. Go to blogger and click Layout

7. Click Add Gadget and select 'HTML/Javascript

8. Paste below code.

<div class="circlemenu">
<ul>
<li><a href="#"><span>Home</span></a></li>
<li><a href="#"><span>Download</span></a></li>
<li><a href="h#"><span>CSS</span></a></li>
<li><a href="#"><span>About</span></a></li>
<li><a href="http://www.bloggertrix.com/"><span>Contact Us</span></a></li>
</ul>
</div>
Replace # with your links.

9. Now save your HTML/Javascript'.

    You are done...

Curved Glossy Navigation Bar for Blogger


This is a curved glossy navigation bar. Im gonna explain
how  to  add  it  to  blogger. This  menu  work  fine  with
every modern  internet  browsers.You can link with your
main  pages by  using  wire frame   navigation. Im  using 
Css3 and HTML

Curved+Glossy+Navigation+Bar


1. Log in to blogger account and Click drop down.
blog-post-option
2. Now select "Template" Like Below.

Select-template

3. Now you can see Live on blog, Click EDIT HTML Button"

4. Find this tag by using Ctrl+F    ]]></b:skin>

5. Paste below code Before ]]></b:skin> tag

/* The CSS Code for the menu starts here bloggertrix.com */
.btrix_glossymenu1{
 position: relative;padding: 0 0 0 34px;margin: 0 auto 0 auto;
 background: url(https://blogger.googleusercontent.com/img/b/R29vZ2xl/AVvXsEjlCV8wzp1qVmPDe52JCdzkyExJMHqAGaaULQiCieoaCAwBB5tuKPlXBCEwNHQ2QXB1rRKjI1y3TrLCxoEOb5z-0kofiCnDBFEZrolZBF6S11DcXrfItinv38Jpw60h-UWTd_PMVlUhWLs/s1600/btrix_menupu_bg.gif) repeat-x; 
 height: 46px;
 list-style: none;
}
.btrix_glossymenu1 li{
 float:left;
}
.btrix_glossymenu1 li a{
 float: left;display: block;color:#000;
 text-decoration: none;
 font-family: sans-serif;
 font-size: 13px;
 font-weight: bold;
 padding:0 0 0 16px; 
 height: 46px;
 line-height: 46px;
 text-align: center;
 cursor: pointer; 
}
.btrix_glossymenu1 li a b{
 float: left;display: block;padding: 0 24px 0 8px; 
}
.btrix_glossymenu1 li.current a, .btrix_glossymenu1 li a:hover{
 color: #fff;
 background: url(https://blogger.googleusercontent.com/img/b/R29vZ2xl/AVvXsEh6FFlL8AzOcKi5rqHaAvFU81HrzvVUSuHaXiWTGXlBjY3QvcPqWB2gDE-K9XxeB0keOPypazoEgTuvDKH9mk361-4MzBZtvtI3kOwaD0j63QTbJPLl2omvxux6THX_IUujihZ8Yox-4Do/s1600/btrix_menupu_hover_left.gif) no-repeat;
 background-position: left;
}
.btrix_glossymenu1 li.current a b, .btrix_glossymenu1 li a:hover b{
 color: #fff;
 background: url(https://blogger.googleusercontent.com/img/b/R29vZ2xl/AVvXsEi4W5XFtkVXuUqgr3V8KvWw6kBsmTVmCKCxQ-7hGsPGWgAtHhONMN7lpr_thRXBGmekmbrqIyadI0aHWwMsJZzkVeztIPAvut3fEGDLz6Nqbif6iCKhdNzXTSDGUKuaxUtfaN-PbU6RE2Y/s1600/btrix_menupu_hover_right.gif) no-repeat right top;
}

6. Go to blogger and click Layout

7. Click Add Gadget and select 'HTML/Javascript

8. Paste below code.

<ul class="btrix_glossymenu1">
 <li class="current"><a href="#"><b>Home</b></a></li>
 <li><a href="#"><b>CSS</b></a></li>
 <li><a href="#"><b>Forums</b></a></li> 
 <li><a href="#"><b>Webmaster Tools</b></a></li> 
 <li><a href="#"><b>JavaScript</b></a></li> 
 <li><a href="#"><b>Contact Us</b></a></li> 
</ul>
Replace # with your links.

9. Now save your HTML/Javascript'.

    You are done...

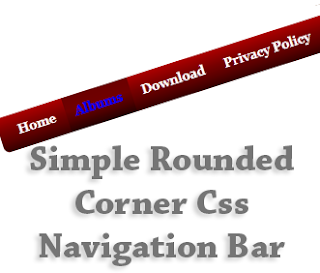
Simple Rounded Corner Css Navigation Bar to Blogger


In this tutorial im gonna  explain how to add simple
rounded   corner   Css   Navigation  Bar  to  blogger.
This menu  work  fine  with every  modern  internet 
browsers. You  can  link  with  your  main pages by 
using this navigation bar. Im using Css3 and HTML


1. Log in to blogger account and Click drop down.
blog-post-option
2. Now select "Template" Like Below.

Select-template

3. Now you can see Live on blog, Click EDIT HTML Button"

4. Find this tag by using Ctrl+F    ]]></b:skin>

5. Paste below code Before ]]></b:skin> tag

/* The CSS Code for the menu starts here bloggertrix.com */
#roundbar_btrix {
background-image:url(https://blogger.googleusercontent.com/img/b/R29vZ2xl/AVvXsEjBLQIcqEb5w-mz7Q4n1zEJNRSCLhFdHdqc15I48SLVPQYxL84-XKMAc1HWhNfXNOMN5Fv-hjGBB3kiEQDxcGDif3Gn8bA-dCLiHLM_D5BS-dw7SH8098Bn0RAyiV7WH6z6ORHa0M8nlRo/s1600/round_menu.png);
background-repeat:no-repeat;
margin-left:14px;
padding-left:10px;
height:46px;
}

#round_btrix {
float:left;
height:27px;
margin-bottom:0;
font-size:100%;
width:1000px;
line-height:normal;
margin-top:0
}
#round_btrix ul {
list-style:none;
margin:0;
padding:0
}
#round_btrix li {
display:inline;
margin:0;
padding:0
}
#round_btrix a {
float:left;
padding-right:1px;
font-weight:bold;
text-decoration:none
}
#round_btrix a span {
display:block;
padding-left:10px;
padding-right:10px;
padding-top:10px;
font-weight:bold;
height:27px;
color:#FFF;
font-size:100%;
border-left:0 solid #dcdcdc;
margin-right:0;
float:none
}
#round_btrix a:hover span {
color:blue;
background-image:url(https://blogger.googleusercontent.com/img/b/R29vZ2xl/AVvXsEg2dvUfh1maJEsmam7KZf9S4oiepGSltsZT8ihOu1FjcuFS16q7y7yL5IfauYIr7xf3hJGWCMdu3TDw0zybF13fcJIIT1hl-PxsIb-5Wl9GjYdYR6AqDvu3Iz54xnt-9-nQZLTbaKQuNXc/s1600/round_hover.png);
background-color:maroon;
background-repeat:repeat-x;
height:27px;
padding-left:10px;
padding-right:10px;
padding-top:10px;
font-weight:bold;
font-size:100%;
background-position:0 0
}

6. Go to blogger and click Layout

7. Click Add Gadget and select 'HTML/Javascript

8. Paste below code.

<div id="roundbar_btrix">
<div id="round_btrix">
<ul>
<li id="current"><a href="#" title="home"><span>Home</span></a></li>
<li><a href="#"><span>Albums</span></a></li>
<li><a href="#"><span>Download</span></a></li>
<li><a href="#"><span>Privacy Policy</span></a></li>
<li><a href="#"><span>Lyrics</span></a></li>
<li><a href="#"><span>Music</span></a></li>
<li><a href="#"><span>Videos</span></a></li>
<li><a href="#"><span>About</span></a></li>
<li><a href="#"><span>Contact us</span></a></li>
</ul></div></div>
Replace # with your links.

9. Now save your HTML/Javascript'.

    You are done...

Css3 Navigation Bar With Google Custom Search Box


This is  a  unique  tutorial. In  this  post im   gonna
explain  How to add 3 in 1 Css3   navigation bar. It
include   Social    network  profile   like  Facebook,
twitter and  Rss  with  Google  custom Search box.
This menu  work fine  with  every modern   internet
browsers. You  can  link with  your main   pages by
using this  navigation  bar.Im using Css3 and HTML

Css3+Navigation+Bar+With+Google+Custom+Search+Box


1. Log in to blogger account and Click drop down.
blog-post-option
2. Now select "Template" Like Below.

Select-template

3. Now you can see Live on blog, Click EDIT HTML Button"

4. Find this tag by using Ctrl+F    ]]></b:skin>

5. Paste below code Before ]]></b:skin> tag

#btrix1nav{border:none 5px #000000;
-moz-border-radius-topleft: 15px;-moz-border-radius-topright:14px;-moz-border-radius-bottomleft:14px;-moz-border-radius-bottomright:14px;-webkit-border-top-left-radius:15px;-webkit-border-top-right-radius:14px;-webkit-border-bottom-left-radius:14px;-webkit-border-bottom-right-radius:14px;
border-top-left-radius:15px;border-top-right-radius:14px;border-bottom-left-radius:14px;border-bottom-right-radius:14px;-moz-box-shadow: 2px 3px 5px #000000;-webkit-box-shadow: 2px 3px 5px #000000;box-shadow: 2px 3px 5px #000000;
        width:900px;   
 margin: 0 0 0 0px;
 padding: 12px 0 8px 0;
 clear: both; 
 background: #696969 left bottom no-repeat; 
}

#btrix1nav .catList{
 padding: 4px 0 0 35px;
 float: left;
    margin-top:-3px; 
}

#btrix1nav .pageList{
 padding: 8px 0px 0 0;
 float: right; 
}

#btrix1nav ul li{
 float: left;
 margin: 0 18px 0 0 ;
}

#btrix1nav a{
 color: #fff;
    list-style:none;
    text-decoration: none;
    
}

#btrix1nav a:hover{
 color: #919191;
}

#btrix1nav li {
list-style:none;
text-decoration:none;
}

#search{
 margin: -2px 20px 0 0;
 float: right;  
}

#updatesBox { 
 
 margin-left: 100px; 
}


6. Go to blogger and click Layout

7. Click Add Gadget and select 'HTML/Javascript

8. Paste below code.

<div class="clearfix" id="btrix1nav">
<ul class="catList">
<li class="cat-item cat-item-5"><a href="#">Home</a></li>
<li class="cat-item cat-item-3"><a href="#">Downloads</a></li>
<li class="cat-item cat-item-6"><a href="#">Tools</a></li>
<li class="cat-item cat-item-4"><a href="#">Css3</a></li>
<li class="cat-item cat-item-4"><a href="#">HTML</a></li>
<li class="cat-item cat-item-4"><a href="#">Tips</a></li>
<li class="cat-item cat-item-31"><a href="#">About</a></li>
<li class="cat-item cat-item-11"><a href="#">Contact Us</a></li>
</ul>
<div id="search">
<form action="http://www.google.com/cse" id="cse-search-box" target="_blank">
<div>
<input name="cx" type="hidden" value="004972222991511809341:kobh4_l5t3m" />
<input name="ie" type="hidden" value="ISO-8859-1" />
<input class="googleSearchField" name="q" size="20" style="background-color: white; background-image: url(http://www.google.com/cse/intl/en/images/google_custom_search_watermark.gif); background-position: 0% 50%; background-repeat: no-repeat no-repeat; border: 1px solid rgb(126, 157, 185); padding: 2px;" type="text" />
<input class="button" name="sa" type="submit" value="Search" /></div>
<input name="siteurl" type="hidden" value="bloggertrix.com/" /><input name="ref" type="hidden" value="" /><input name="ss" type="hidden" value="" /></form>
<script src="http://www.google.com/cse/brand?form=cse-search-box&amp;lang=en" type="text/javascript"></script>
    </div>
<div id="updatesBox">
<a alt="Subscribe to RSS" class="updatesIcon" href="http://feeds.feedburner.com/bloggertrix" target="_blank" title="Subscribe to RSS" style="margin-left: 80px;"><img src="https://blogger.googleusercontent.com/img/b/R29vZ2xl/AVvXsEgDyply_wPdzE7asKyldVPCqPEuDS6yeoKzfHrt9WFis4lNl23BdfPe1KsByQ-9A24EXSMECRrIfDGw__9ehWgVzNXAG8Ba7q423I1vJT1xfX2fAlxKdyfuEOamKQdezsAXjG1_xPkCgSg/s1600/btrix_RSS-icon.png" style=""></a>
<a alt="Follow Us" class="updatesIcon" href="http://twitter.com/bloggertrix" target="_blank" title="Follow Us"><img src="https://blogger.googleusercontent.com/img/b/R29vZ2xl/AVvXsEhUaJOaEeXplAojNqGNG8XE4Rz4mqcnZNvy_fYb23GC7MXck_zDdRgFev8hLPDrcdr97lYFO9H_2kEku_UwndvA-6YOAqFBjAF-DWf7_yQ4Ogyq3SvwN-l1hIQOUIQWq12s5ugjk4X0gOg/s1600/btrix-twitter-icon.png" /></a>
<a alt="Become a Fan" class="updatesIcon" href="http://www.facebook.com/bloggertrix" target="_blank" title="Become a Fan"><img src="https://blogger.googleusercontent.com/img/b/R29vZ2xl/AVvXsEiLAc-CtddjhzrqVw-WfWew41E_rsDnW-uJHL8vni35zfIZRZ_c11Rxf1d9c2Wn7hlAiZcaKCYT0ZZTJ6xrbSm_cHnfbcsA_0PzM10RKfddsu67eiavOClFtL-KKPiTCkywhhz6gmRuXPk/s1600/btrix-facebook-icon.png" /></a></div>
</div>
Replace # with your links.

Replace bloggertrix with your Feedburner ID
Replace bloggertrix with your Facebook username
Replace bloggertrix with your Twitter Username

9. Now save your HTML/Javascript'.

    You are done...

Back To Top